stThis Halloween String Art is easy, and can you believe it’s done on foam instead of actual wood? What a creative tutorial.
This post is sponsored by FloraCraft Make It: Fun and as always, all opinions are 100% my own.

This post may contain affiliate links, which means I may receive a small commission,
at no cost to you, if you make a purchase through a link.
Sometimes you have a project idea that comes to mind, and when it turns out….you get giddy. Yup, this project is one of them! I love the natural look of it, but can you believe that it’s foam?! This is the newest project for FloraCraft Make It: Fun and their amazing foam products!

This month, Make It: Fun has a free Holiday craft guide eBook that you can download, and this project came as inspiration from one of the projects in the book.

Supplies:
- 1 inch thick Make It: Fun Foam Sheet
- Foam Cutter
- Smooth Finish
- Putty Knife
- Make It: Fun Rasp Tool
- Wood stain in color of choice
- Nails
- String
- Spider Web template from Halloween eBook

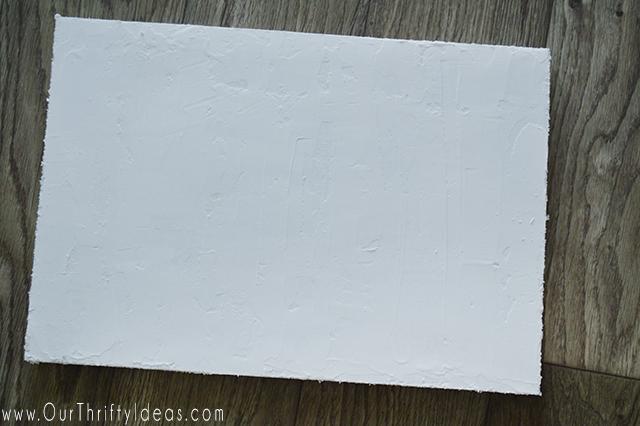
I started with a long 1 inch foam sheet, and cut it down to the size I wanted. The part I like about this is that you can customize it to whatever size is going to fit your decor.

Then I put on multiple coats of smooth finish on the top and sides of the sheet; with a few hours in between each coat to let it fully dry. Once all coats were on and dry, I did some light rubbing with my hand to receive the harsh bumps. Nothing too vigorous though!
After getting all the harsh bumps off the board, I used the rasp tool to create the wood joint lines. Using a straight edge, I slightly indented the foam to create the look of two boards meeting. I did this 3 times, each 3 inches apart.

After the lines were indented, I used a paint brush and some wood stain to lightly cover the board to create the natural wood look. I had a junk rag on hand to soak up the excess where it would start to puddle. Don’t press or rub too hard though, because the stain is going to dampen the smooth finish and it can be easily manipulated! Let the stain dry completely.

Print out the spider web template from the Halloween eBook. I made it a little bigger to print to make it fit my board better.
Now place your nail into a few of the black dots, holding the paper in place. Then using a single nail, poke holes through each dot into the foam to make small indents for future nails!!

Remove the paper (you may need to rip it a little to release it from the nails you put through it!) and reveal all of the holes. Now, put a nail in each one of them! Next, tie a knot in the string around the top left nail to hold the string in place. Then wrap the string around the nails down each line and back again. Once each line is wrapped, cross from line to line to create the spider web effect.

Once you’ve wound all of them, tie the edge of the string around another nail and cut it off.

This has been such a fun addition to our Halloween decorations!

What do you think?


Skeleton White Chocolate Popcorn

Halloween Countdown Chain – Free Printable


Speak Your Mind